Sunday, June 23, 2013

Rapid Prototyping

While trying to work out an effective way to represent the detail around some track work, fellow Proto87 modeler, Rene' Gourley, suggested rapid prototyping (i.e., 3D printing).

So I provided some VR drawings and Rene' reproduced the heal section of the points in 3D electronic space, shrunk, meshed and had some trial copies printed by Shapeways.

The initial design featured a 'floor' that continues below the sleepers. However, Rene' printed a second version that looks a little closer to RTR track (i.e. with the webbing).

The local Vancouver Proto87 group met at my place last week and we decide to see how it worked and looked. As you can see, the Code 55 rail is laid directly over it. (Note that the final version will use dropper to operate the points - not the copper clad method).

Rene has been undertaking the same for his layout. As can seen, he has had a trial printed for the 'v' section (16mm gauge), which includes the check rails, with the rail slotting in against it. It will be noted that a different material has been used, which results in crisper detail.


Monday, March 25, 2013

VR Track Work - Update

All,

A bit of an update.

Further to a few requests regarding the overall plan, I've added the image below, which shows a plan of Sutton Grange. (Note that this is a heavily 're-worked' version of the official VR Windermere yard and station plan dated 1916).

Jules

Monday, March 4, 2013

VR Track Work

Hi All,

In between hammering away on the J Class kits, I regulalry meet up with some other 'proto' modellers that reside in and around Vancouver. We've had quite a few sessions at my place, with Andrew being the most regular attendee (cheers, mate).

We've made some steady progress on my layout, Sutton Grange, which is now in it's third version (previous baseboards construction has just not been up to scratch).

I ordered some sleeper from Kappler Scale Lumber, located just over the boarder in Washington State, USA. Kapler offer a 'bespoke' service, which I took them up on and ordered several thousand standard and longer switch ties/sleepers, all to correct VR scale dimensions. Erik, at Kappler did a great job!

As far as I'm concerned, track work is also a model. So when it comes to matters of weathering and ballasting of track, I can spend hours reviewing prototype photos and modelling approaches to faithfully portray real track - actually, real VR track. Anal? Absolutely.

However, I recently came a cross a blog site by USA-based Proto48 modeller, Jim Lincoln. Jim's blog, The Delaware Lackawanna in Proto48, is well worth a look. Indeed, it was this post and this one that caught my eye.

Following some of Jim's tips and ideas, sleepers/ties were laid, distressed with a Dremal stainless steel brush, and weathered using cheap thinned acrylic paints to achieve a brown, blood-red colour so often observed on VR track from the 1960's and 1970's. Colours include burnt umber, burnt sienna, raw umber etc, while white chinagraph pencils were used to give a hint of grey weathering here and there (followed by more thinned paints to tone it down). After adding some ME code 55 track, it's starting to look the part. (Note that the track hardware is yet to be installed.)

Next, how to portray 'typical' VR branch line ballast...

Jules 


Monday, February 11, 2013

Light at the end of the tunnel

All,

I've been really getting stuck in to the P87 18.37mm gauge J Class project since Christmas. As you can see, it's getting there. (For the record; the tender is in undercoat, as it was completed some time ago.)

My apologies for the dirty state of the engine - it still needs a wash. The engine still needs to be tested on some track under its own 'steam' - particularly through some points. Then the final parts need to be added to complete the model.

I'm starting to see some light at the end of the tunnel.

Cheers,

Julian


Thursday, December 20, 2012

I'm getting close...and so is Christmas

All,

I tried for one last blast to get the J running but work and Christmas (we're about to fly back to Australia) have intervened. As it turned out, the Mashima motor is cactus too... *rolls eyes*

Anyway, I'm getting closer (note that the boiler is only sitting on the frames - hence they appear a little wonky.)

Merry Christmas!

Julian


Friday, September 14, 2012

More progress


All,

I've been getting into the machining 'thing' and learning how to use the mini-lathe. After completing the trial tyre, I've moved into 'production’. I have machined the axles and wheel centres. The next step is to produce a batch of tyres.


Here are some axles - I've got another four of these suckers for the second kit.


The wheel centre, trial tyre, and axle 'combo'.


Here is the trial wheel (left) versus the original wheel (right).


Julian


Monday, August 6, 2012

J Class Tyre

Hi All,

An unhealthy combination of work, together with a far more healthy dose of family and holidays has put a ‘go slow’ on the J class.

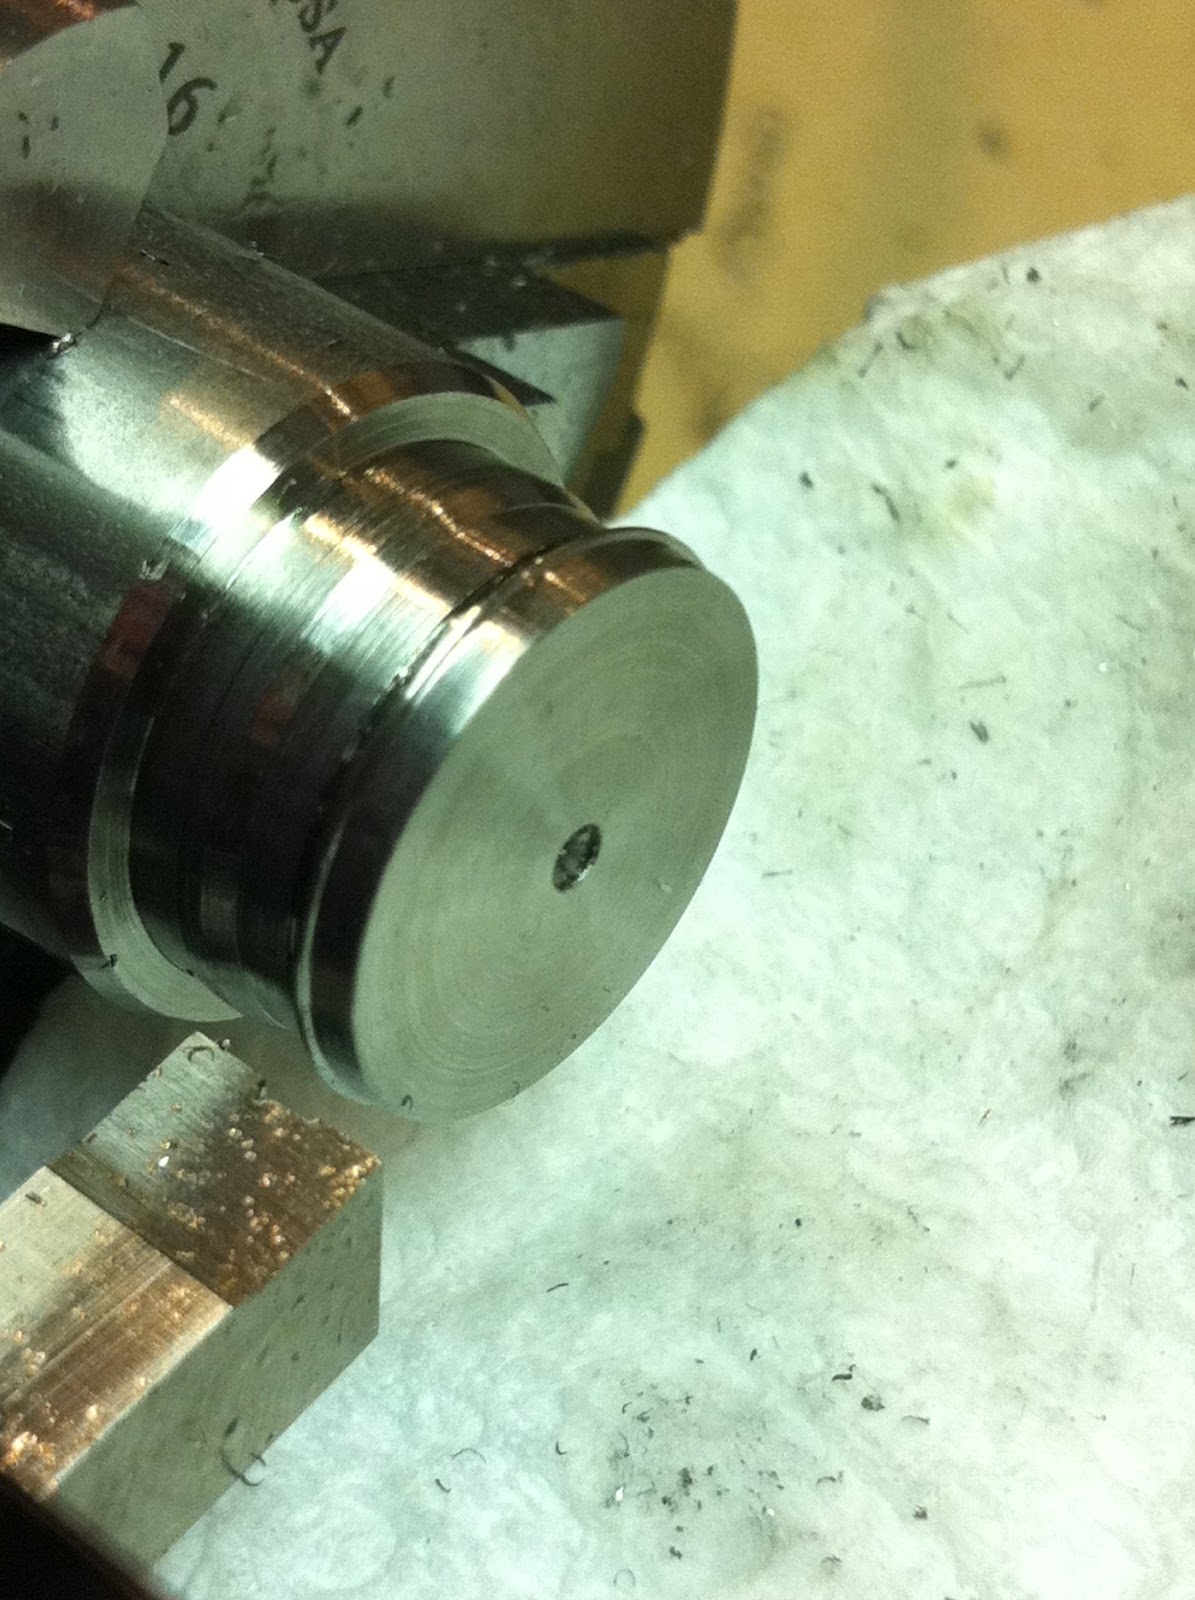
I’ve been developing my machining skills over the last couple of weeks, which has resulted in the first trial J Class tyre profile. I was not able to machine the bore, as I need to purchase a drill bit.
As can be seen, I removed as much material (stainless steel) I could, leaving around 10 thou on the tread and flange. I then used the Proto87 form tool, I finished the tyre surface by slightly feeding in the tool and rotating the chuck by hand.


The Proto87 form tool takes up a considerable amount of room on either side of the tyre. I removed enough material to accommodate. However, this will be time consuming and wasteful when it comes to machining all wheels. Consequently, I am considering machining several tyres to the basic shape, followed by boring the centre, then parting off each unit. I can then mount each tyre on a mandrel and finish off with the Proto87 tool.

Jules